Topics
v0.7.1
Course Editor
This section of the documentation will go into detail about how to use the course editor itself. To start creating training scenarios, navigate to the Courses page and click the Create Course button in the top right.

Give your course a general name to describe the types of scenarios that will be present. The course name will be seen by the trainee. Select the simulator this course should go with. This cannot be changed later, so choose well.
After naming and creating your course, it will appear on the list and you can press the Edit Course button to be taken to the Course Editor.

Editor Page
This is the main page of the course editor. There are a several different sections to explain:
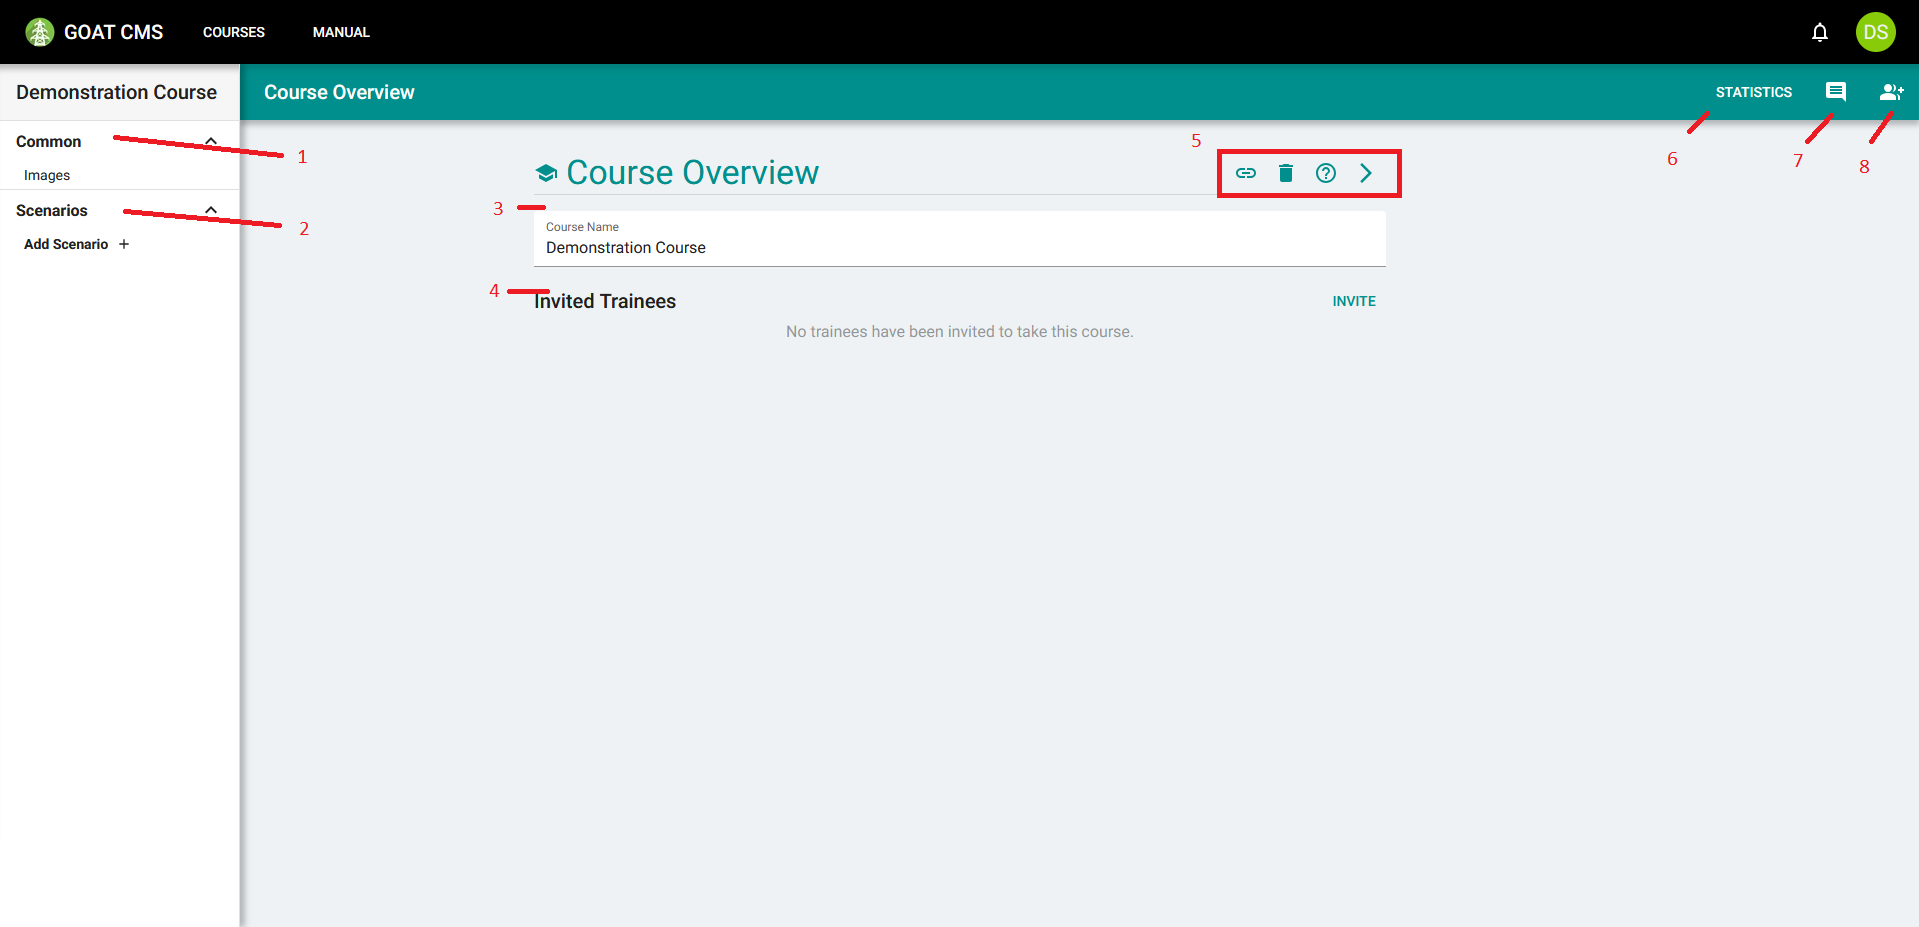
- 1. Common section: Contains common objects shared by each scenario in the course, such as images for display in the After-Action Report.
- 2. Scenario list: A list of all scenarios in the course.
- 3. Course Fields: A form for editing the basic information about the course.
- 4. Trainee section: A list of trainees that have been invited to the course, which can be managed with the Invite button to the right.
- 5. Action Buttons: A list of actions that can be triggered. These will be explained in more detail below.
- 6. Statistics: Quick link to the course's Statistics page.
- 7. Comments: Open the comments window.
- 8. Editors: Only available to the course owner. Allows managing which staff accounts have been invited to edit the course.
This page changes to display different input fields depending on what type of object is selected. For example, here is the editor page for a scenario:
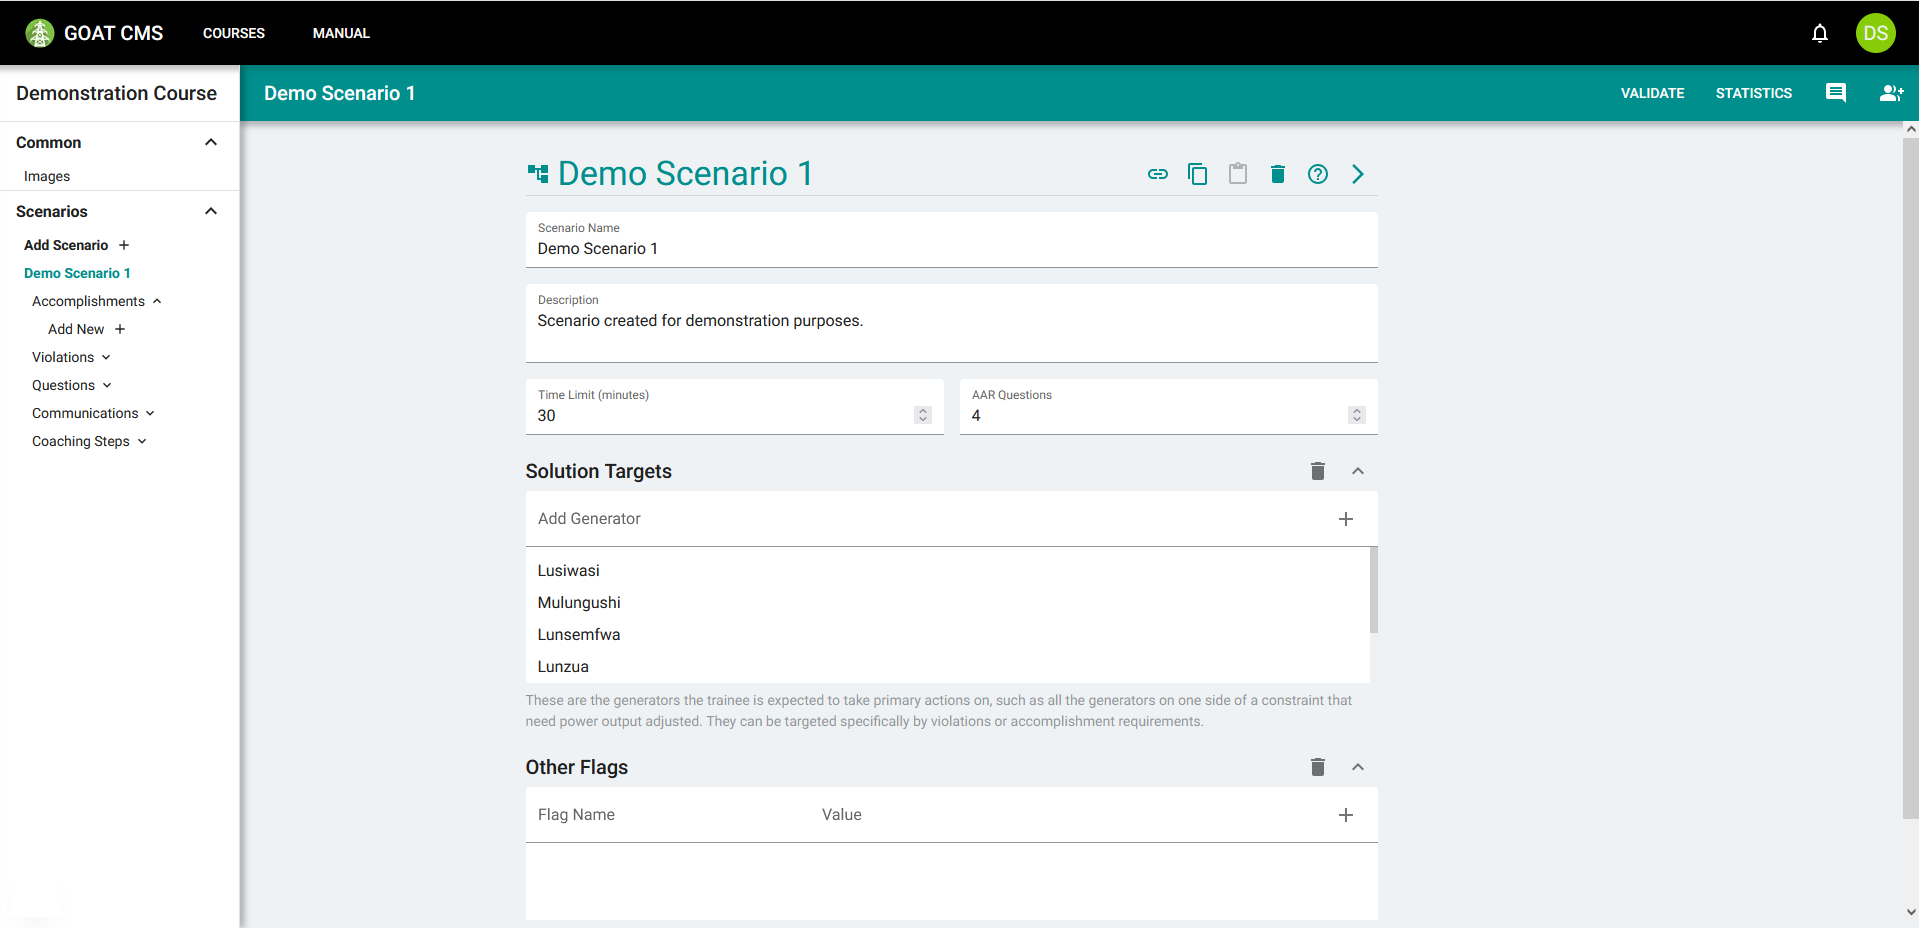
On the Scenarios page of this manual, you can see that every field described has a corresponding input in the form. To understand what each field in an editor form does, view the corresponding manual page. See the Editor Input Fields page to learn how to use each input field.
Action Buttons

Up to 8 action buttons can appear when using the course editor, which will be explained here. From left to right:
- Save: Appears when the selected object is edited (shown with an asterisk by the object name). Saves changes.
- Revert: Appears when the selected object is edited. Discard current changes and revert to the state at the last save.
- Copy Link: Copies a link to this specific selection.
- Copy Values: Copy the values of the selected object so that it can be pasted to another object of the same type. Especially useful when creating multiple similar scenarios.
- Paste Values: Paste values copied from a different object of the same type.
- Delete: Delete the currently selected object. Cannot be undone.
- Manual: Open the manual page for the selected object type.
- Collapse: Collapse the action bar. The same button can be pressed to expand it again.
Keyboard Shortcuts
Ctrl+S: Save current changes.
Ctrl+C: Copy the values of the selected object.
Ctrl+V: Paste the copied object values.
# See Also