Topics
v0.7.1
Input Field Types
There are several types of input fields that can appear in the editor, some of which can be quite complicated. This page will attempt to help describe them.
Basic
There are five basic types of input field that are found most commonly throughout the editor. These input field types behave as you would expect. They are:
- Single-line text input
- Multi-line text input
- Numeric input
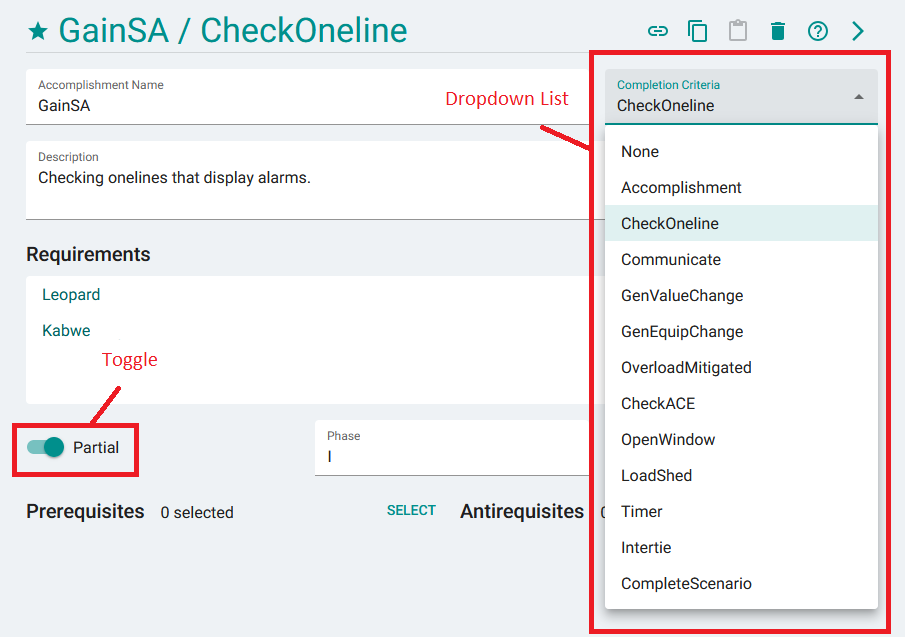
- Toggle/checkbox
- Dropdown list, allowing for a single selection from a list of options.
The first three types are shown here, on the page for editing a Scenario:
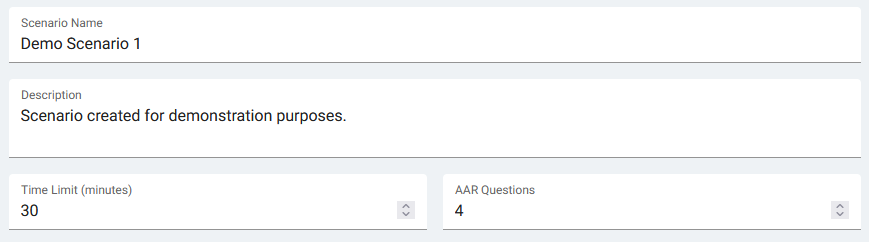
From top to bottom: single line text field, multi-line text field for longer text content, and two numeric fields.
The toggle and dropdown list can be seen when editing an Accomplishment:
Object selection
Some objects have to refer to other objects. An example of this is Violations, each of which has an associated Question that it can trigger. We use these object selection fields to create that connection.
Some object references refer to only a single object, like the Violations example. This also applies to Coaching Steps which can optionally reference an Accomplishment. This is done with a dropdown list.
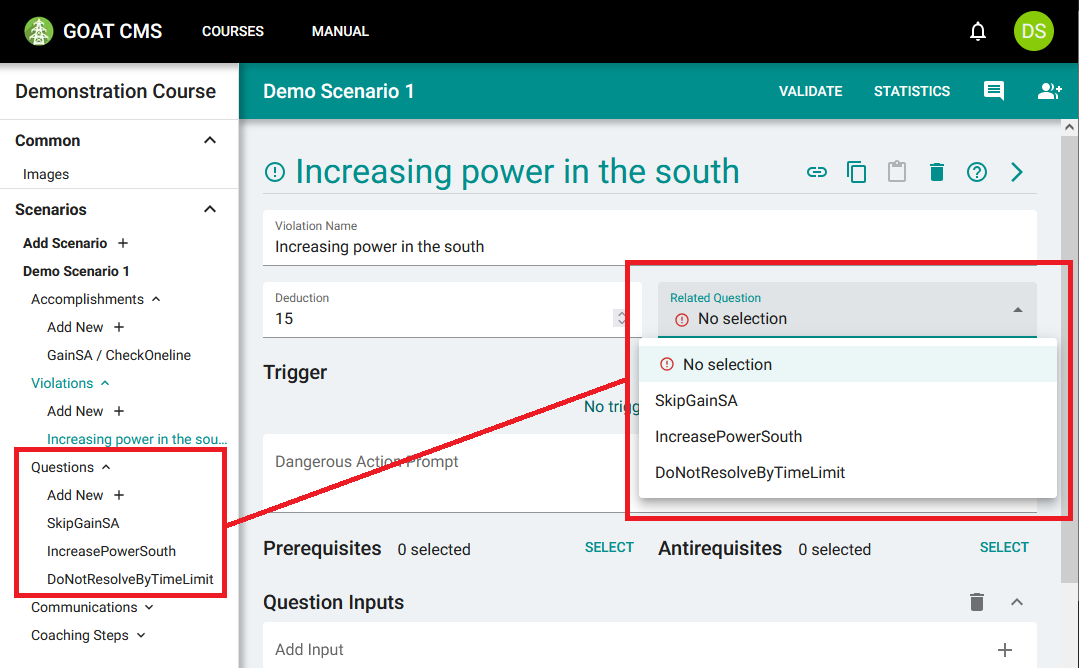
Notice how the options in the dropdown list match the questions that exist in the scenario.
Other references can involve multiple different objects of a given type. This primarily applies to lists of prerequisite and antirequisite Accomplishments which are described on the Accomplishments page. It also applies to the lists of images that are shown while answering a Question. These fields are collapsed to a small element showing how many objects are currently selected.

The Prerequisites field currently has 2 Accomplishments selected.
By clicking the Select button, you can open the object selector. At the top of the window, you can see the name of the field and an explanation. You can then select as many as necessary from a list of available objects. Finally, you can press Confirm to save the selection, or Cancel to return it to its original state.
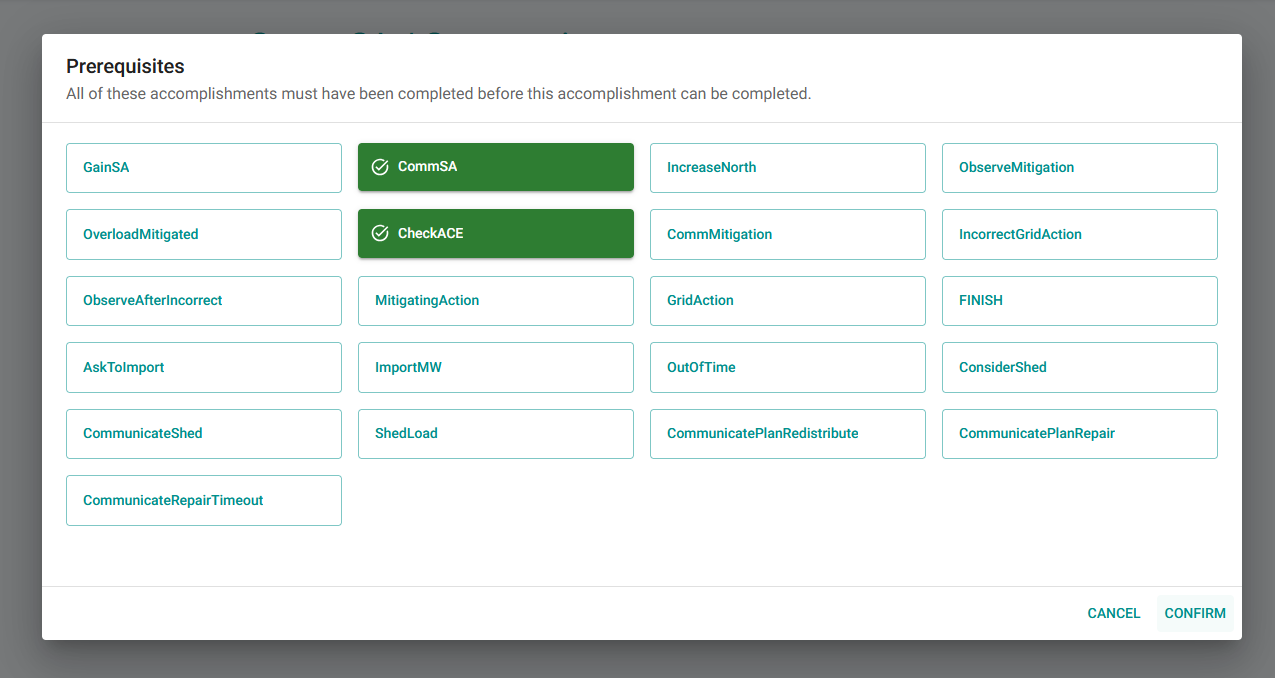
All Accomplishments in the scenario are shown, and 2 are selected as prerequisites.
If a referenced object is deleted, the field will become invalid. The reference must either be removed or changed to a different object. If a referenced object is deleted, the field will show a warning.
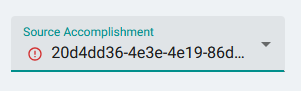
In this example, the referenced accomplishment has been deleted. Its old ID is still shown in the field.
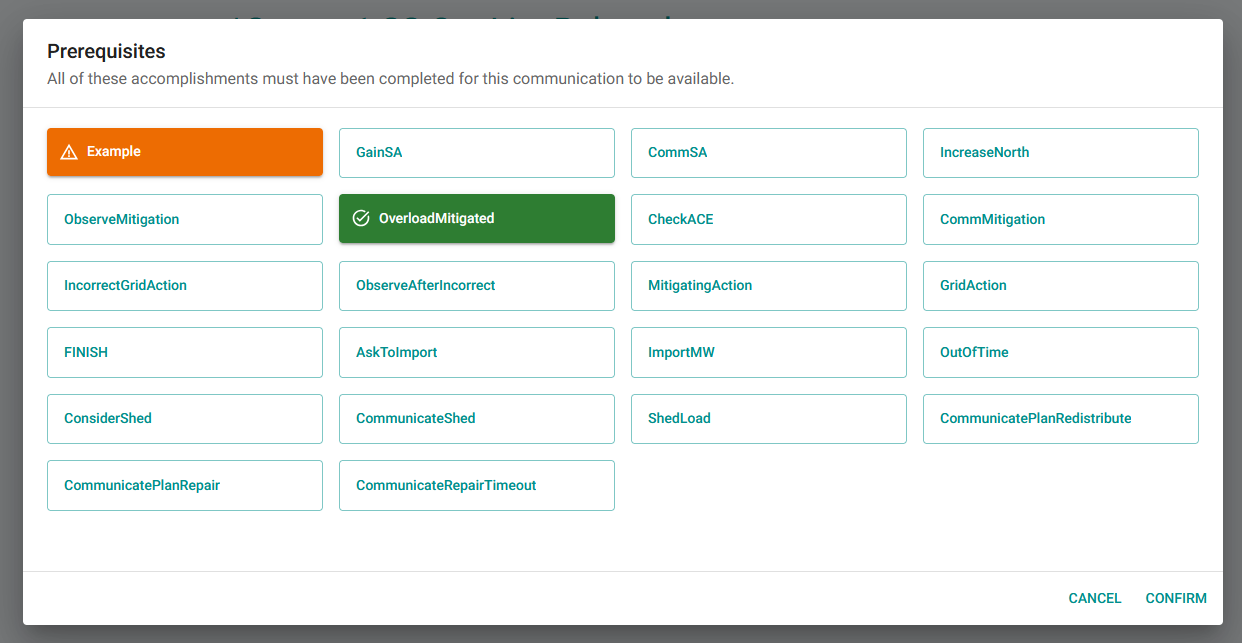
For fields with multiple selections, it shows a warning icon before opening the selection tool.

The Prerequisites field currently has 2 Accomplishments selected, but at least one is missing.
When opening the selector, you can simply click on the missing object to remove it from the list.
Lists
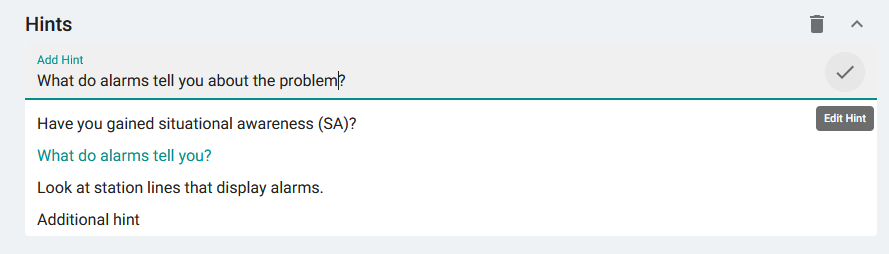
Another common input field is the list field. As opposed to most text fields which represent a single string of text, these represent a list of multiple strings of text. These have a variety of uses, one example being coaching hints:
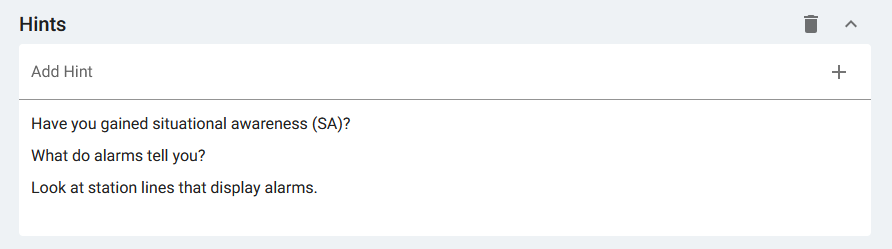
The hints in this list will be displayed one at a time, as the trainee requests help for gaining Situational Awareness.
To add an item to the list, you can type into the Add Hint text box. Then you can press Enter or click the + button to add it to the list.
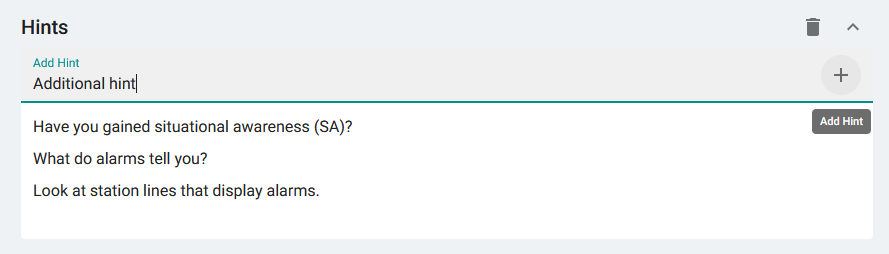
You can click an item in the list to edit it, at which point it will be selected and appear in the text box. The item you are editing will be highlighted in green. When you are done, you can press enter or click the checkmark button to apply the edit.
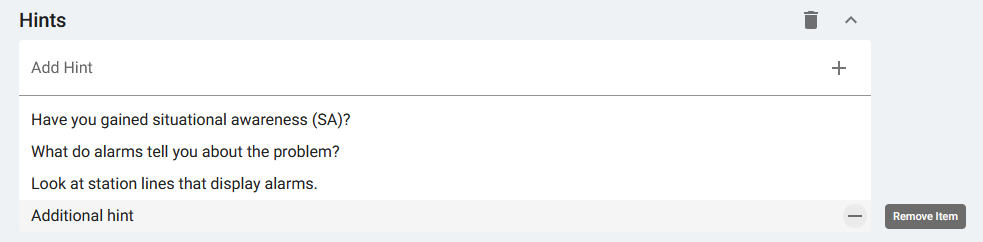
Clicking the - button when hovering over a list item will remove it from the list. You can also clear the entire list with the trashcan button.
Trainee Answer Stub and Expert Answers
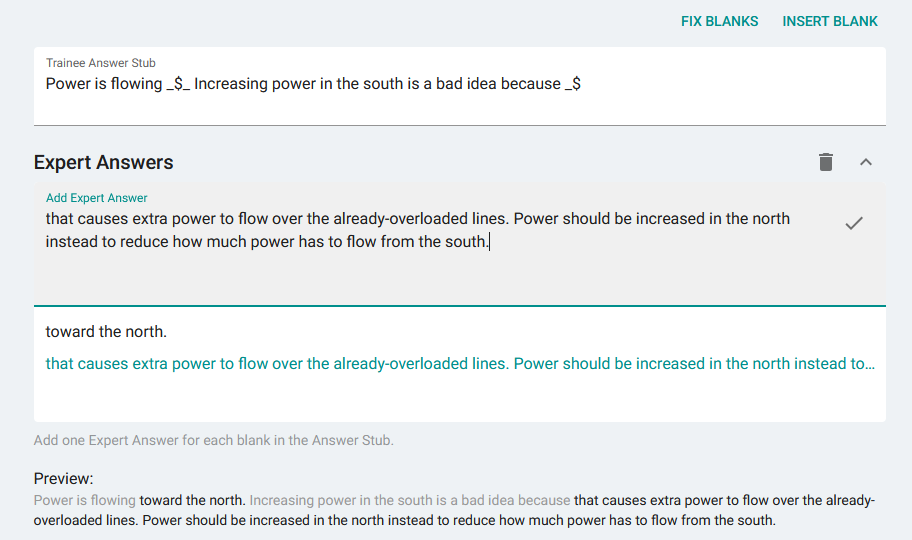
These fields are special variations of the multiline text field and text list field, respectively. The trainee answer stub provides the fill-in-the-blank question that the trainee must complete. The expert answer is a list of an expert's response to the same question, with one entry for each blank.
The stub field has buttons above it for managing the different blanks, which are represented by the string _$_. It's important that these remain in the proper format—the Fix Blanks button can help with that. Improvements to this format are planned for the future.
The Expert Answer list works identically to the typical text list field, except allowing for longer wrapping input. Below the Expert Answer list is a preview that shows the trainee answer stub with the expert's answer filled in.
Violation Trigger Editor
Violation triggers are quite complicated. A Violation's trigger defines the actions it can match with. If an action performed by the trainee matches a Violation's trigger, the Violation will activate and the associated Question will appear in the After-Action Report.
Because violation triggers have to be so complicated, there is a very robust dialog window that is used to construct them. An in-depth tutorial for using this window can be found on the Violation Triggers page.
Check triggers are added very similarly to violation triggers.
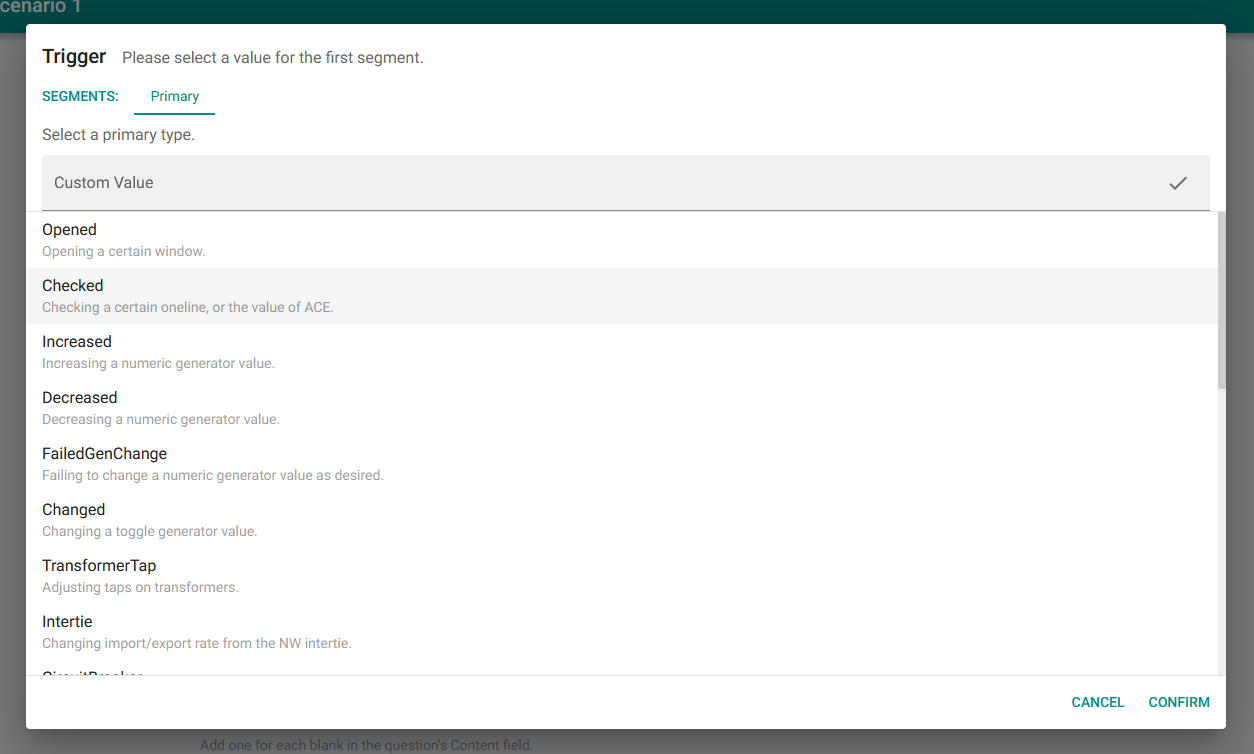
The violation trigger editor.
Accomplishment Requirement Editor
The Requirements field is for defining specific things that must be completed under an Accomplishment's general criteria. Requirements are also quite complicated, and are constructed similarly to Violation Triggers. They don't work exactly the same, but they use a very similar editor:
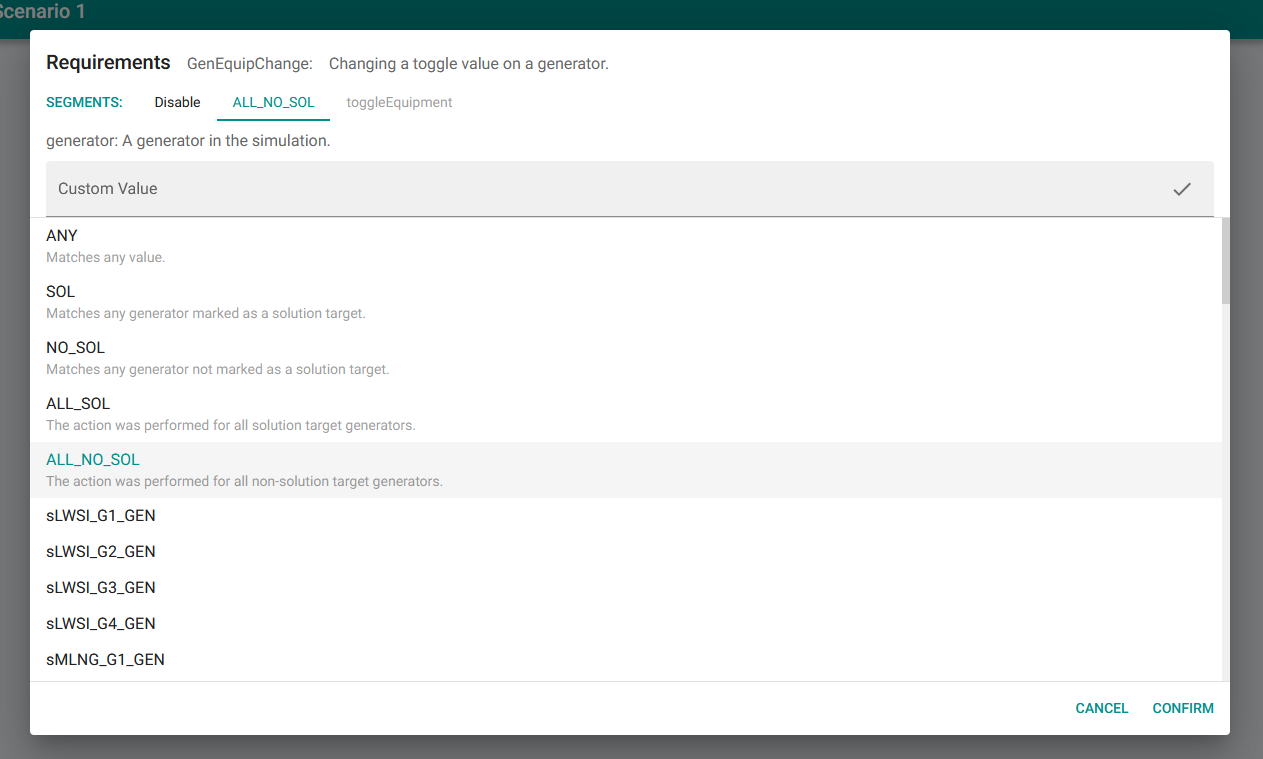
The requirement editor.
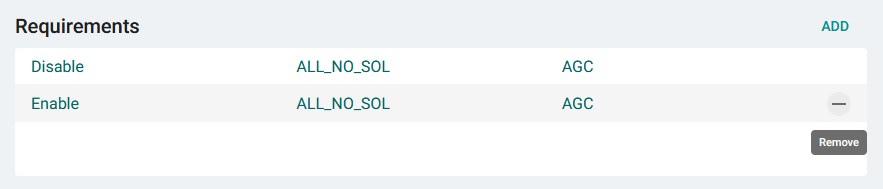
The main difference is that accomplishment requirements don't have a primary segment—instead, the accomplishment's Completion Criteria field determines how the requirement is structured. Additionally, each accomplishment can have multiple requirements (or zero) so they are displayed as a list. As with other list fields, individual requirements can be modified or removed.
Copying Field Values
It is sometimes beneficial to copy and paste field values between different objects of the same type. Perhaps two violations are identical except that they can trigger at different times, or perhaps two scenarios would have identical copies of many questions. In these instances, the copy and paste feature allows you to create these almost-identical objects without having to painstakingly copy each individual field.

Clicking the Copy button (or pressing Ctrl+C) will copy the value in each field and save it to the clipboard. After navigating to another object of the same type, you can click the Paste button (or press Ctrl+V) to overwrite the object with those same values. You can then save with the Save button (or Ctrl+S) to apply the changes.