Initial Setup
In this tutorial, we will create a course and training scenario from the ground up to demonstrate the general workflow. The scenario will be very simple. We will assume that a relay has led to an overload between the Kabwe and Leopard stations. Because power is flowing toward the north, the trainee should increase how much power is generated in the north. This causes less power to flow over the overloaded lines. We will also assume that a generator in the south is on AGC, which will handle decreasing power to balance ACE. The trainee must diagnose the problem, communicate their intentions as necessary, resolve the problem, monitor the grid to ensure it has the correct effects, and communicate that the scenario was resolved.
Creating the Scenario
Before you can create a scenario, you must first create a course. Navigate to the Courses page and create a course called Redistributing Power.
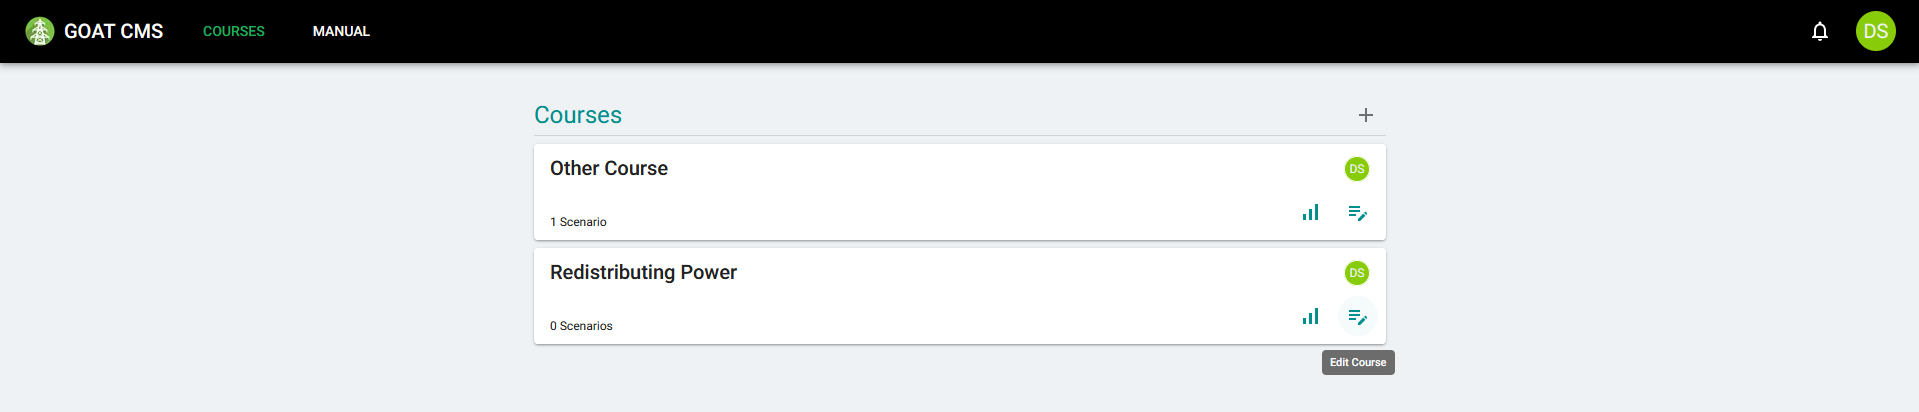
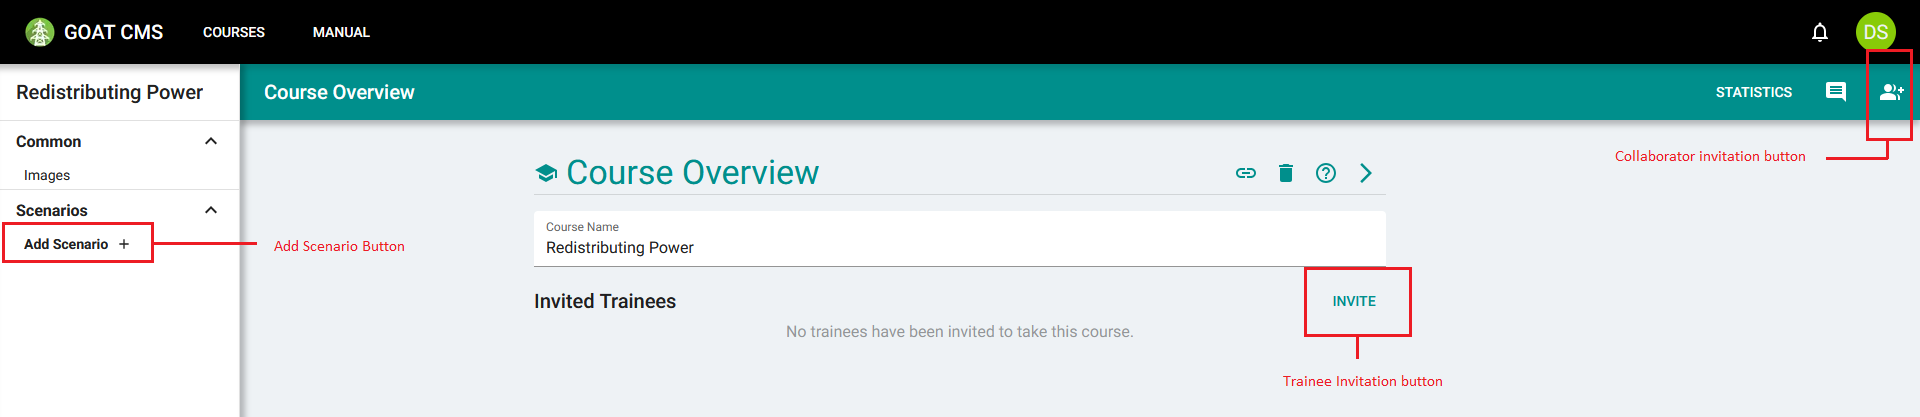
Click the Edit Course button to proceed to the edit page. On the Course Overview page you can invite trainees or collaborators as needed. Then click the Add Scenario button in the left sidebar, and create a scenario named Scenario 1. Scenario names can be seen by the trainee, so they should provide minimal information.
Setup
After creating a scenario, it will automatically be selected in the editor. When a scenario is selected, a form will appear where you can modify the different data fields associated with the scenario. See the Scenarios page for a description of each field.
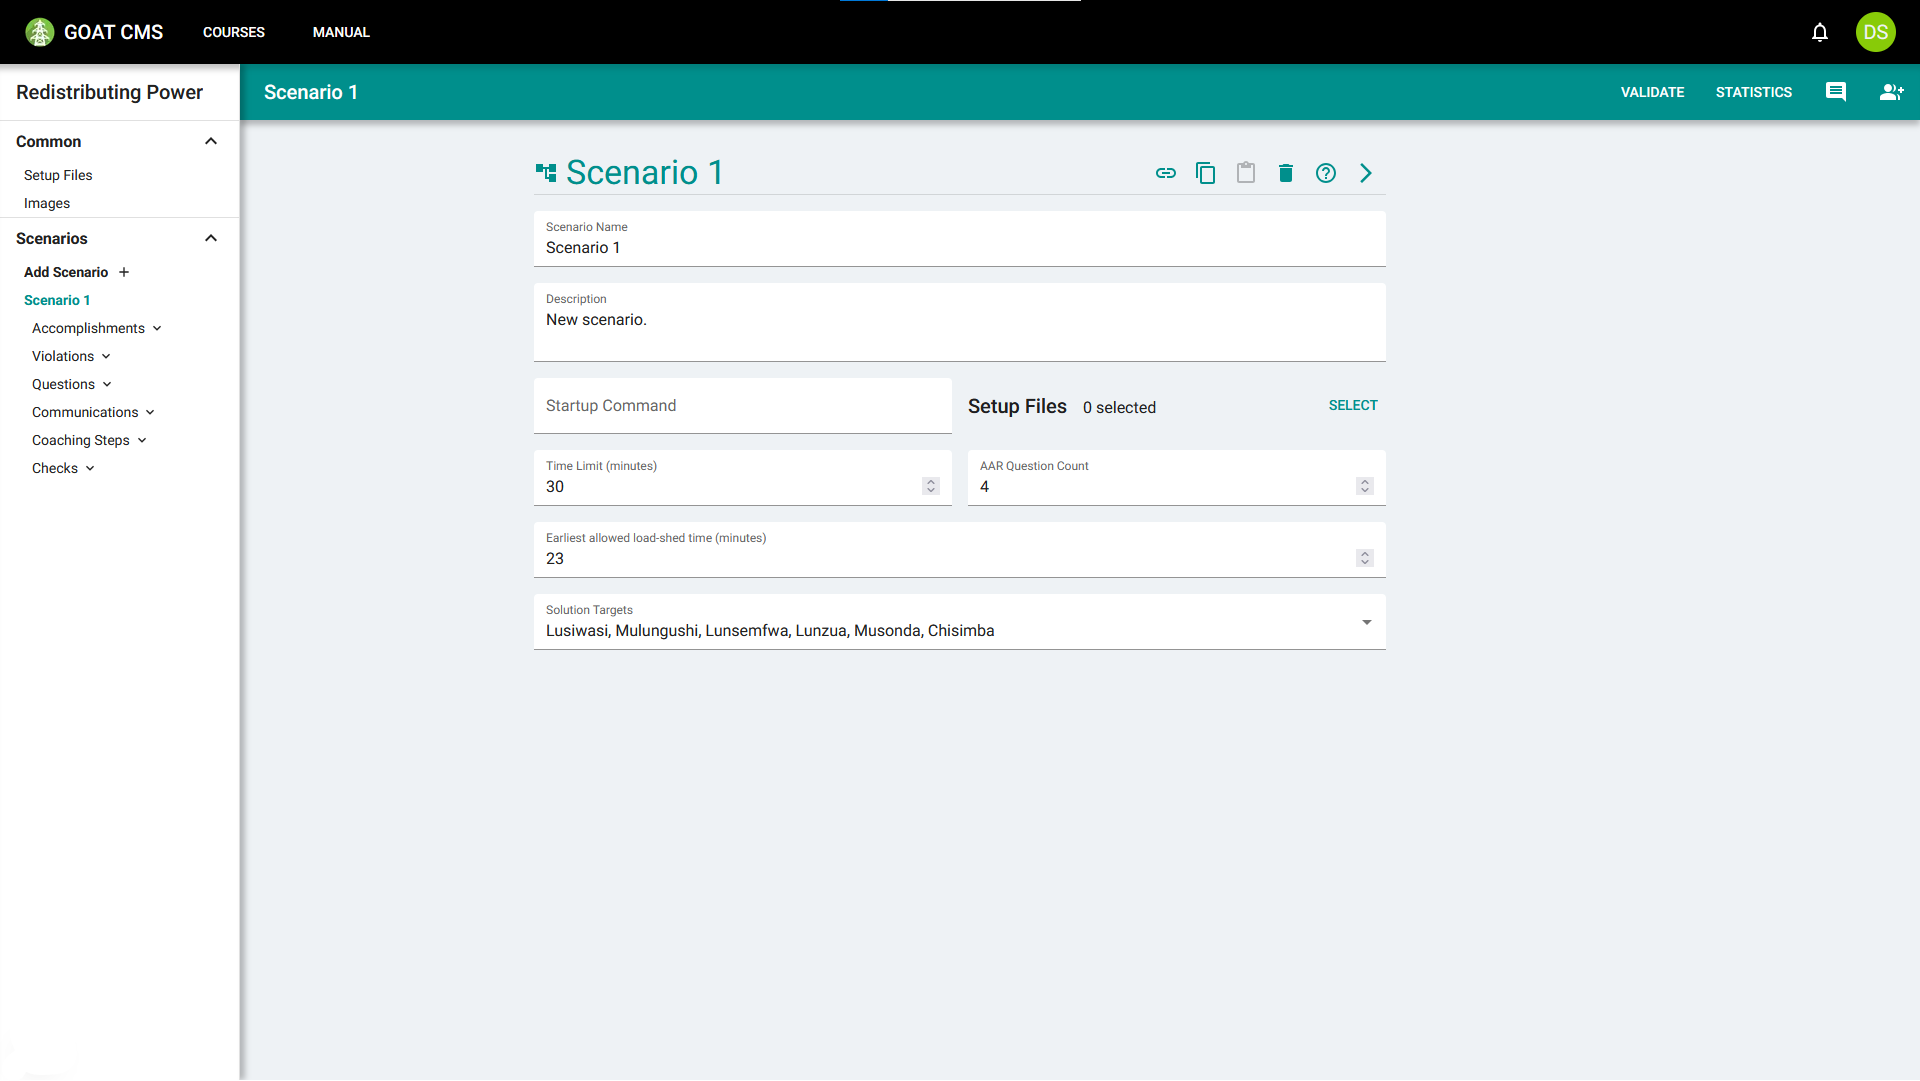
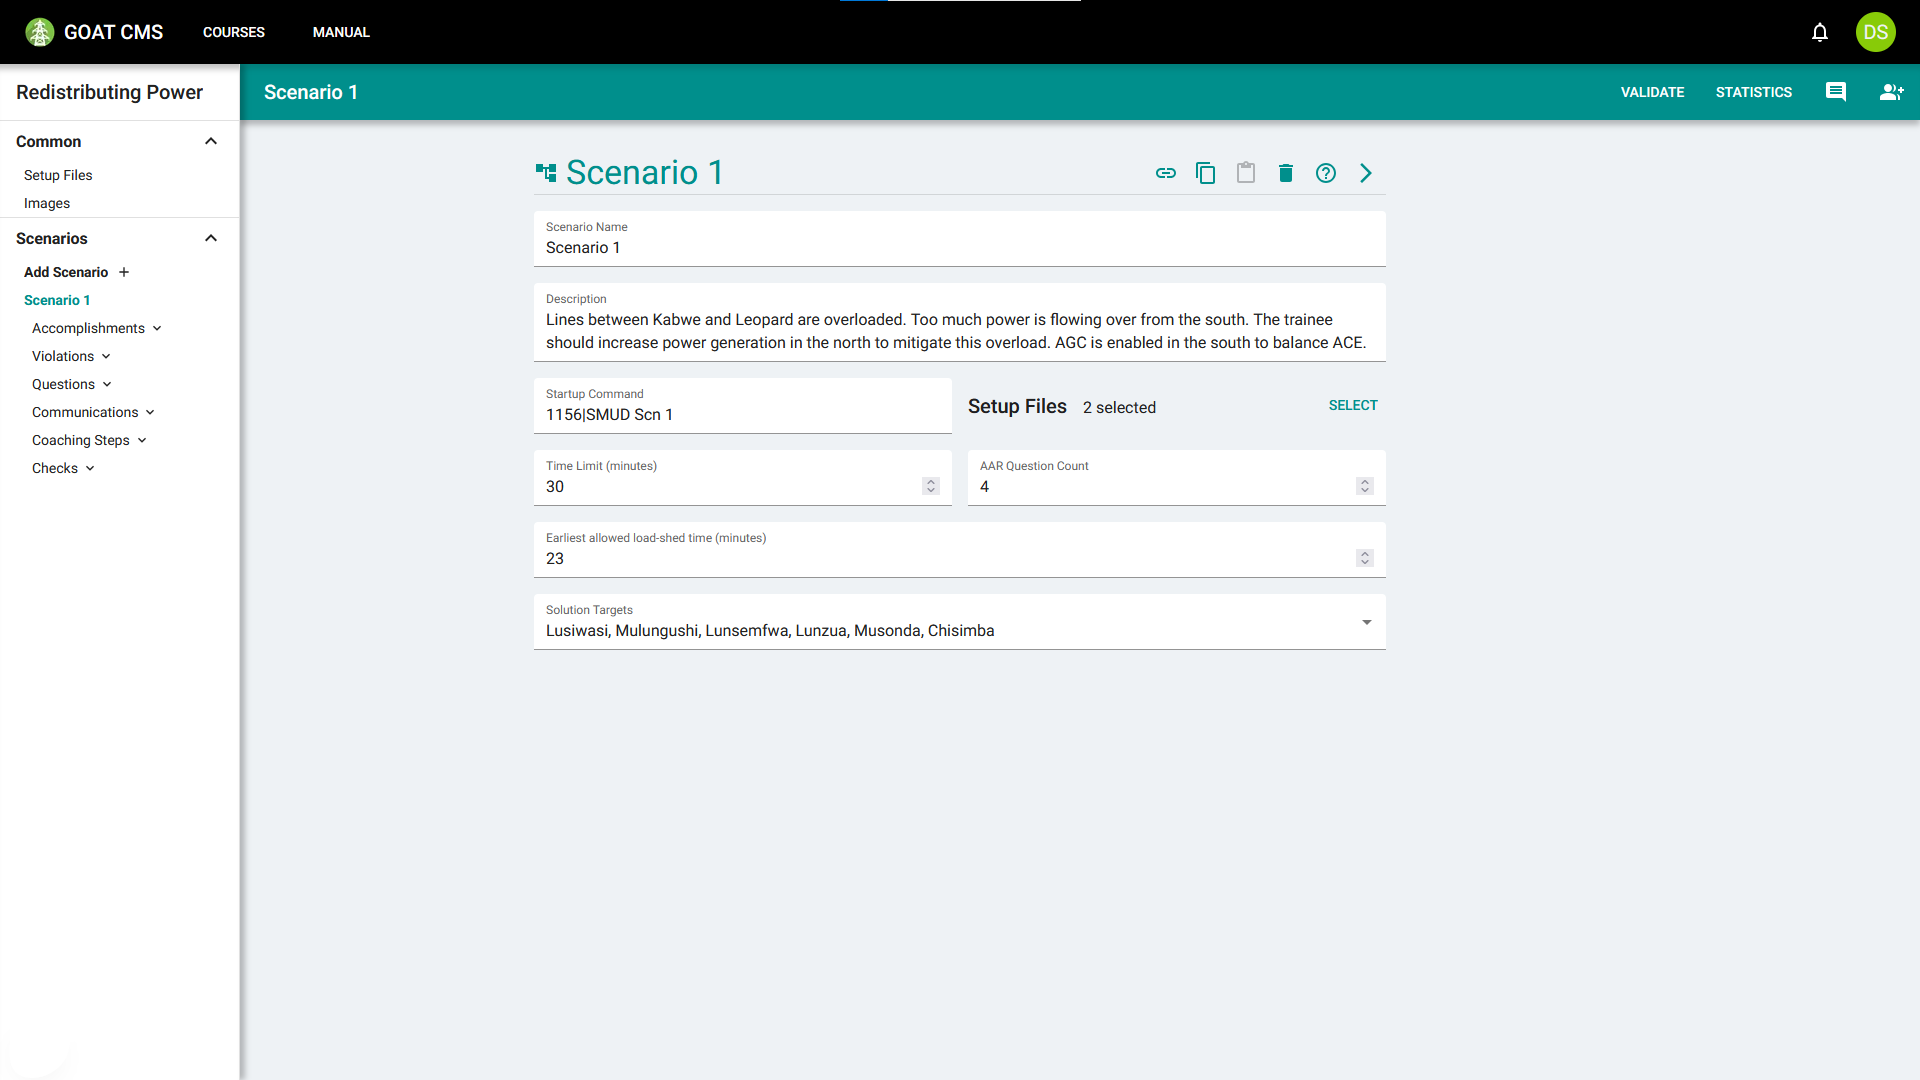
Provide a detailed description for the scenario. The description should say what the problem is, and describe the general course of action the trainee should take to resolve the issue. This description will not be seen by the trainee, so it should be made as helpful as possible to you and any collaborators you invite to the course.
Leave the time limit at 30 minutes, and the AAR Questions field at 4. These determine how long the trainee has to complete the scenario, and the maximum number of Questions to display in the After-Action Report. Leave the load-shed time at 23 minutes, which is the earliest amount of time at which the trainee can consider shedding load. This flag creates a Check called ConsiderShedTime which can be used for scoring.
Next, you will set the solution targets. The trainee is expected to increase power north of the constraint between Kabwe and Leopard, so the solution targets should be a list of the generators found north of Kabwe. These are Lusiwasi, Mulungushi, Lunsemfwa, Lunzua, Musonda, and Chisimba.
Setup Files
Finally, you must provide the required files that the simulator uses to start the scenario. Click the Common > Setup Files link in the sidebar.
Setup files are used by the simulator itself, and so the files you need will differ between simulators. For the transmission simulator, we need both Initial Condition (.ic) files and Scenario (.scn) files. In particular, Scenario 1 is started with 1156.ic and SMUD Scn 1.scn.
SMUD Scn 1.scn also depends on InitialRampRates.scn, OnlyPosRampRates.scn, limits Leopard Kabwe MW 470 A 811.scn, and KBSD T20 limits.scn. Upload those as well, so that the trainee has access to all of these files.
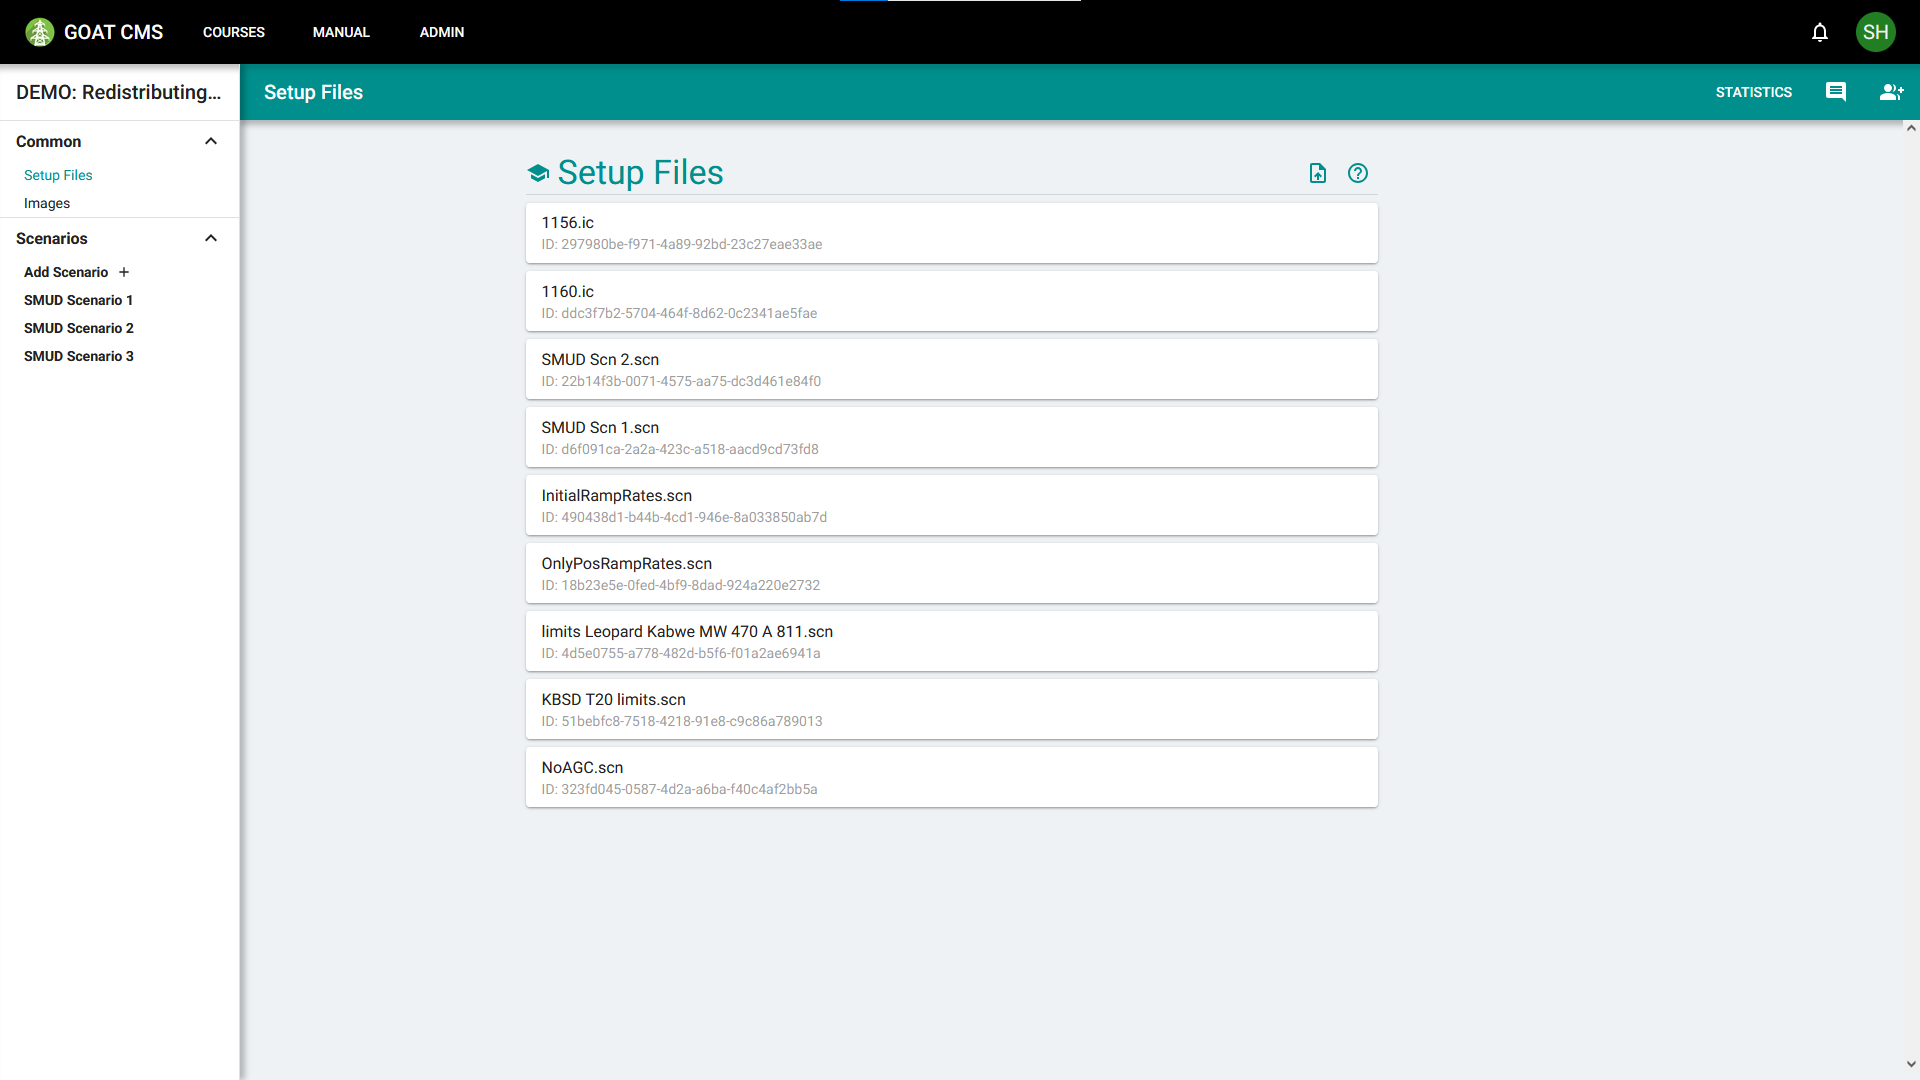
Some setup files are provided for Scenario 2 as well.
Click on SMUD Scn 1.scn and select the files it depends on. This ensures that any scenario that requires SMUD Scn 1.scn will also include these other files.
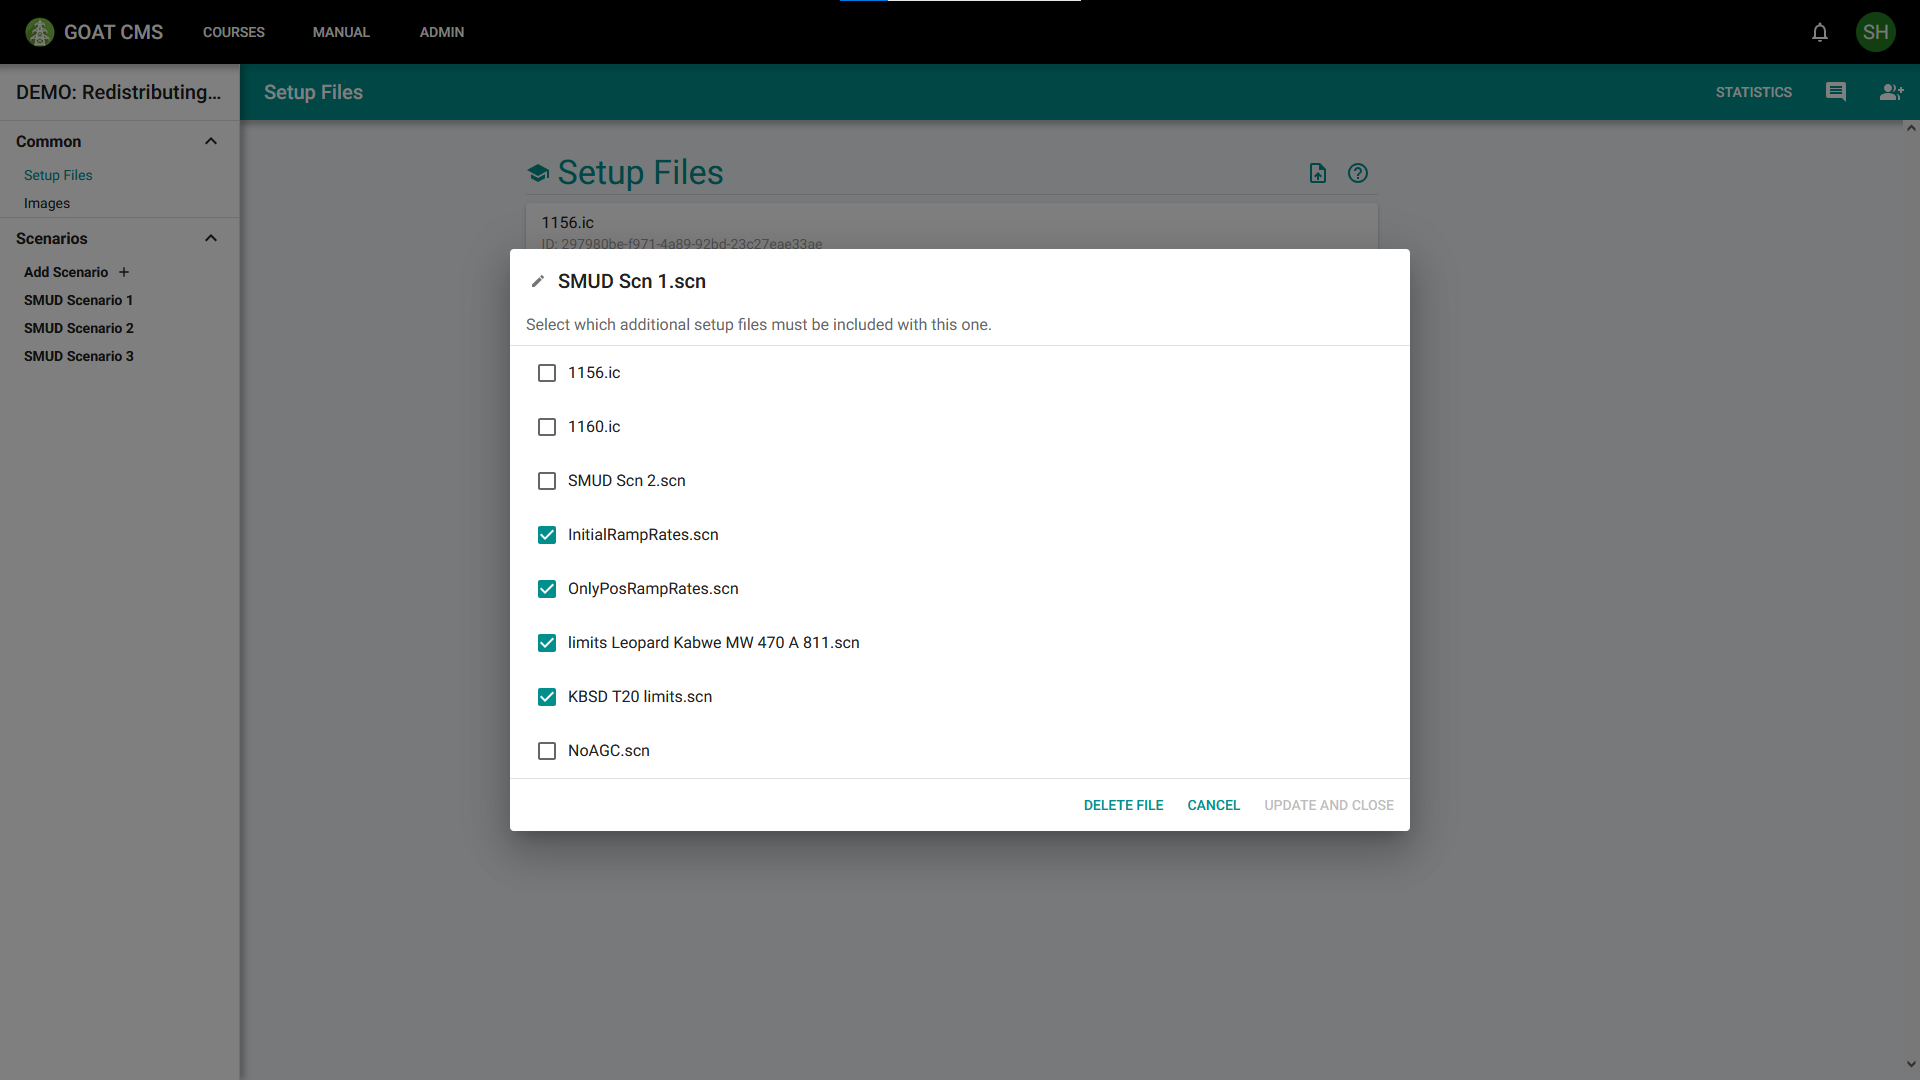
Finally, go back to the scenario and select the 1156.ic and SMUD Scn 1.scn setup files. When the trainee starts this scenario, GOAT will automatically download these files if needed and place them in the proper folder before starting the scenario. This allows course staff to update these files without having to redistribute the entire simulator.
Along with including the files, you need to tell GOAT how to use them through the startup string. This will differ for each simulator. The transmission simulator expects the name of the IC and the name of the main scenario file separated by a | character, so our startup string is 1156|SMUD Scn 1.
Once the scenario is set up, your scenario should appear similar to the image below. You can now begin to add Questions and Violations to start scoring actions.
In the next tutorial, you will learn how to detect incorrect actions performed by the trainee.